A Custom Quake Level
Role: Level Designer
Walls of Ganath is a custom level for Quake (1996), set within the eerie confines of a multi-layered haunted fortress.
Players must breach its defenses and purge the corruption lurking at its core, blending intense action with light puzzle solving.
Solo
8 weeks
Trenchbroom
Project Role:
Level Designer
During an 8-week period I created a playable level for Quake. The work consisted of:
Concepting and sketching
Tool research, game research and reference gathering
Whiteboxing
Playtesting and Iteration
Design documentation
Workflow breakdown
Research
The level development began with gaining an understanding of the source material and tools I am working with. This included:
Understanding Quake gameplay
Understanding the setting and architectural reference
Understanding Trenchbroom engine
Planning the process
Medieval Fortress research
Gym Level
Concept
After sufficient tool research and planning I could began development in the Trenchbroom engine, which consisted of:
Whiteboxing
Creating combat beats
Adding level functionality and logic
Lighting and colors
Fortress gate - Player perspective
First layout sketch
Development
After sufficient tool research and planning I could began development in the Trenchbroom engine, which consisted of:
Whiteboxing
Creating combat beats
Adding level functionality and logic
Lighting and colors
Infested Hall progress
Trench progress
Testing and Iteration
I started playtesting my level and assessing feedback from an early stage of development, following a proper QA plan:
Internal and external playtests
Conditions of Satisfaction document
Assessing feedback points and creating tasks
Conditions of Satisfaction Doc
Feedback assessment rubric
Project Work
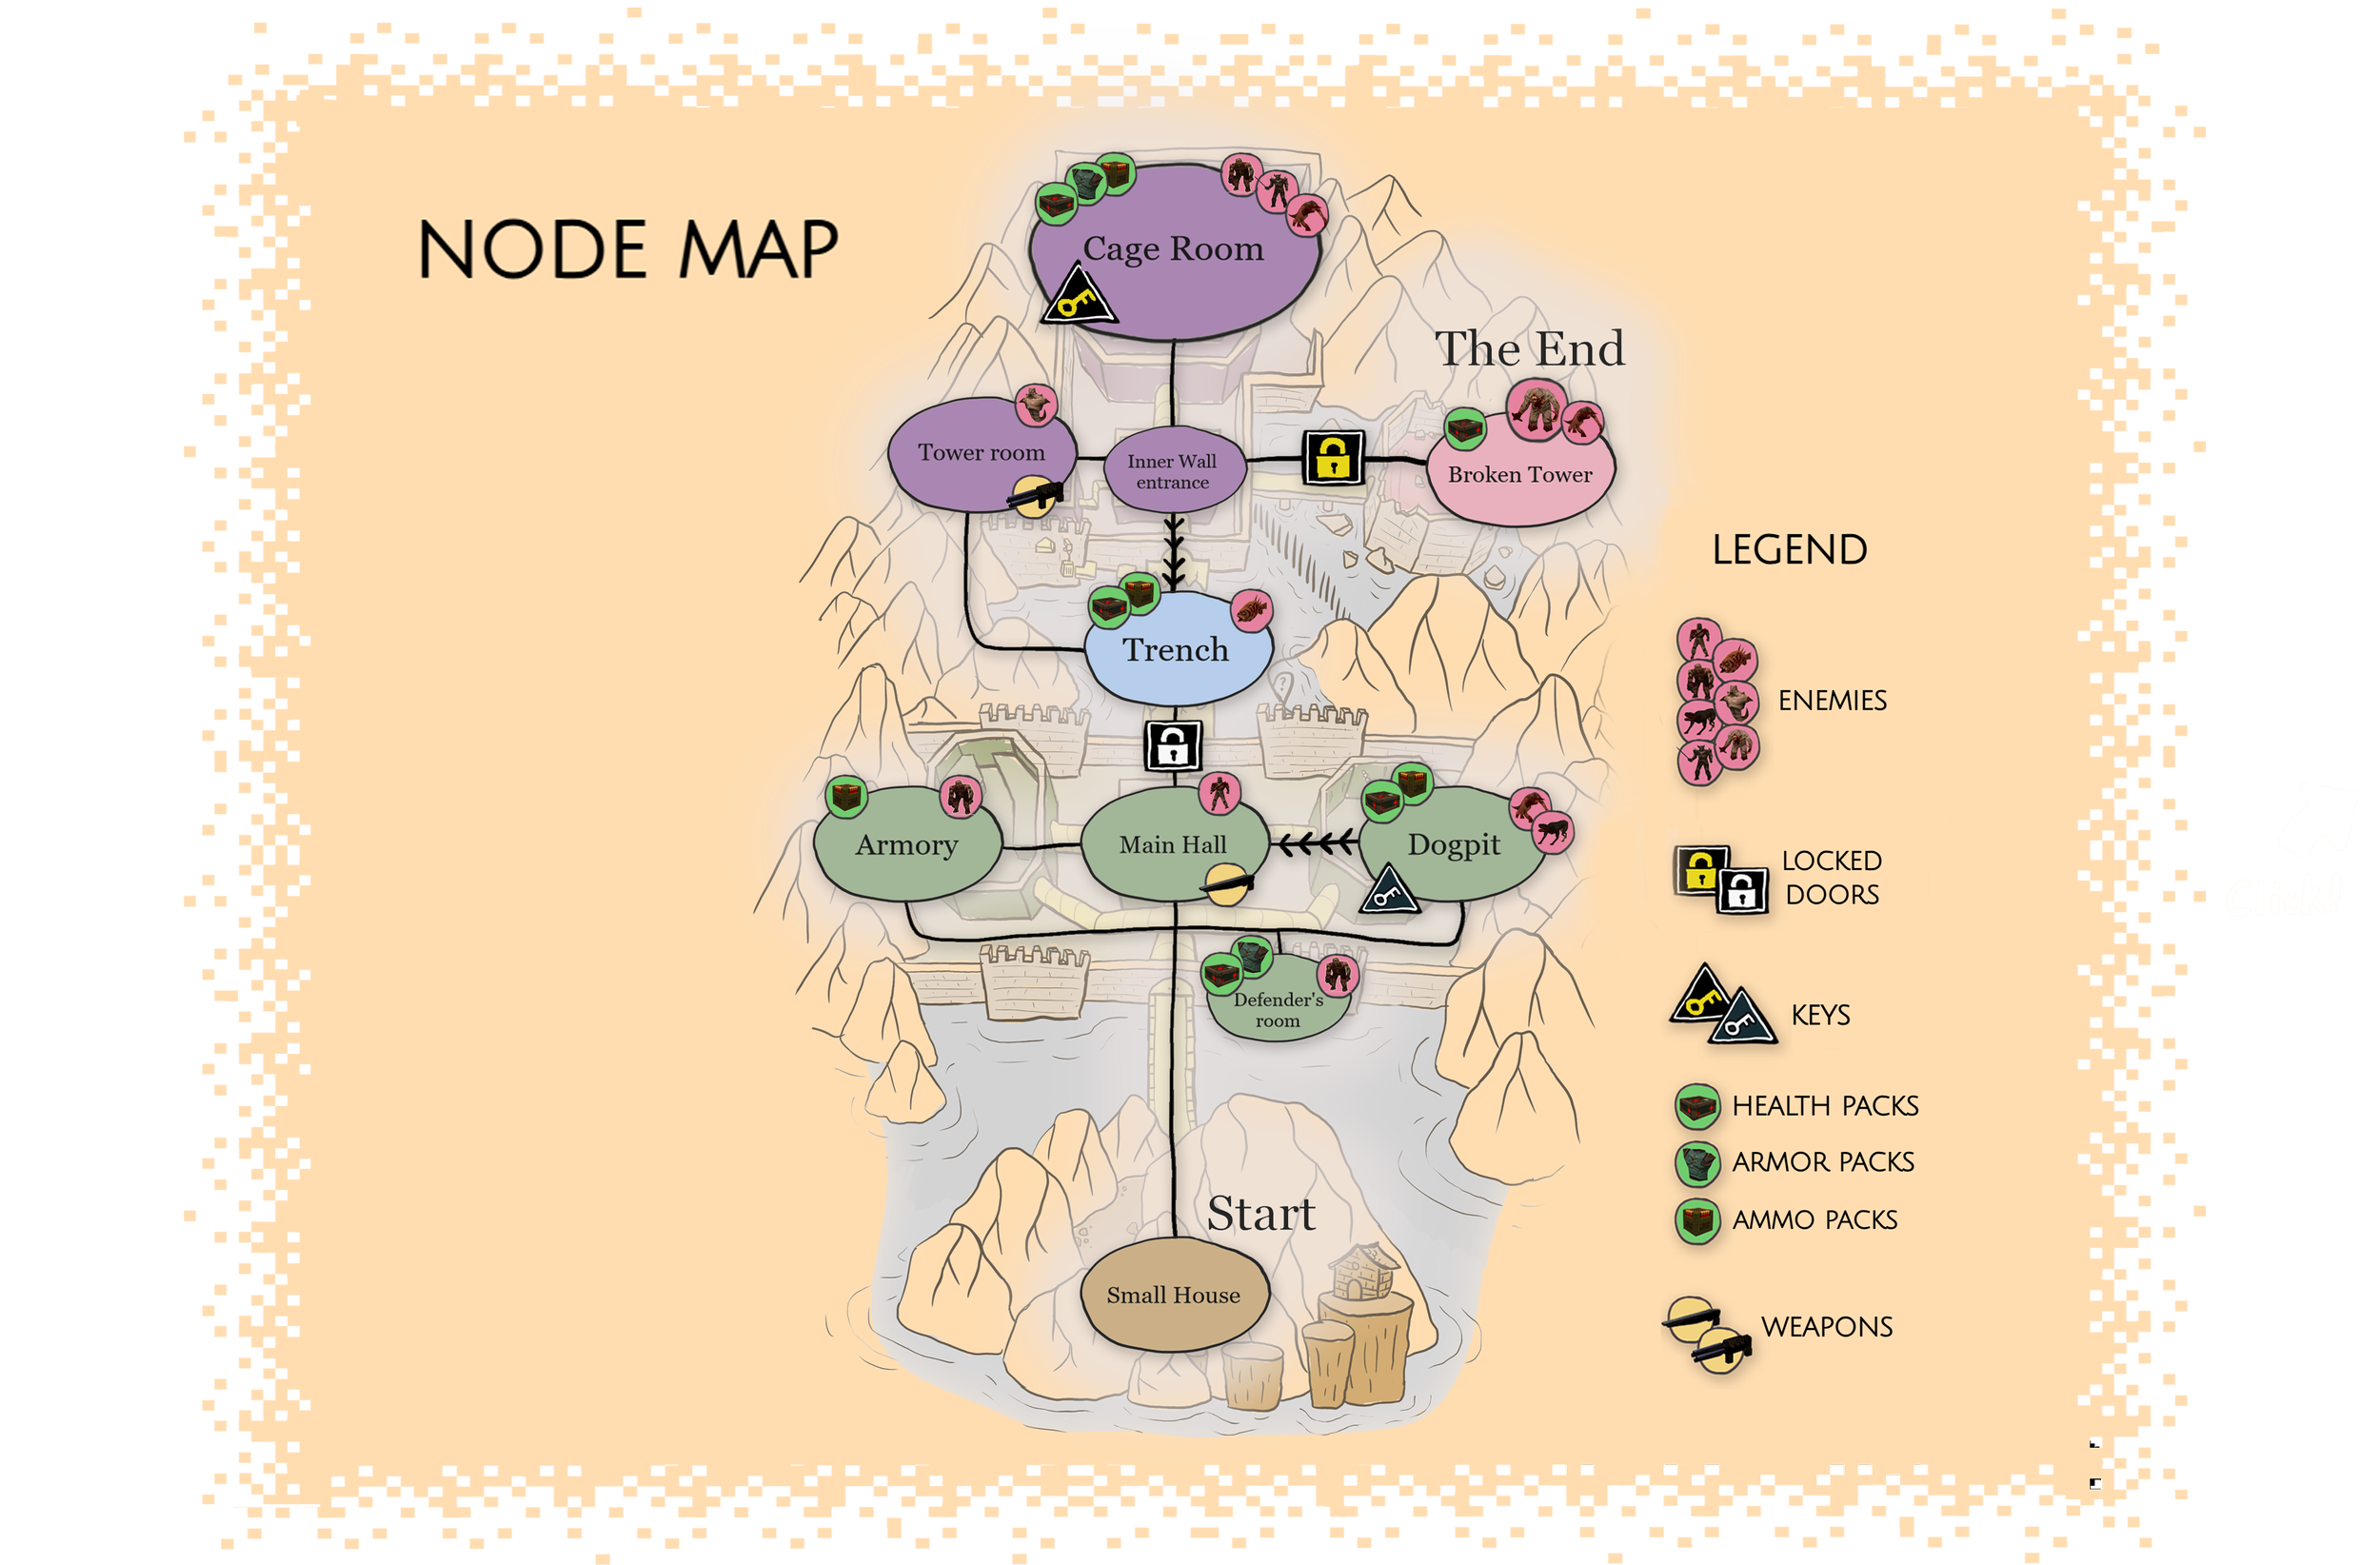
Layout
design pillars
The combat encounters in the level take place within enclosed arena spaces, with multiple waves of enemies following a scripted sequence. This design progressively raises tension, challenging the player with increasingly difficult situations.
Arena Combat
The connector sections between combat beats challenge the player to explore unique and interesting traversal methods, such as navigating underwater. These sections also serve to build tension leading up to the next arena encounter.
Interesting Traversal
In a truly Quake fashion the player is continuously baited and lured into traps with items and visual leashing. Suddenly, they are thrust into challenging situations, forced to battle a group of monsters while simultaneously finding a way to escape.
Trap and Escape
Click through the slideshow below using the arrows!
Gameplay elements
Combat Encounters
The level contains 8 combat beats that are all scripted, sequenced encounters using 5 different types of enemies. Working on these included:
Making scripted enemy wave sequences
Resource and key item placement within arenas
Arena concepting and whiteboxing
Testing and iterating on the combat beats
Exploration Segment: The Trench
Several sections, inculding the Trench area between the two halves of the level were focused on facilitating exploration with the purpose to:
serve as a breather between combat encounters,
reward the players’ curiosity when looking for secrets,
build intrigue in the player and make them want to explore further,
reward them with resources after completing the first set of encounters.
Puzzles
I created different puzzles based on wires connecting buttons to different mechanisms. These beats were aimed to:
Engage the player’s problem solving skills and challenge them in non-combat ways
Serve as movement challenges with the puzzle elements guiding the player
Add variety to the gameplay and compliment the combat ecnounters
Design techniques
Visual Leashing
To solve readability and navigation issues that came up during playtesting, such as players not recognizing the intended path forward, I used shape language and leading lines to guide the eyes of the player.
Onboarding
To make sure players understand the main elements and recurring mechanics in the level, for the first occasion they encounter those mechanics I made them mandatory to progress forward. By blocking the player’s path all their attention is directed at the nature of the obstacle; this is a good way to give them a moment to understand a concept.
In several points of the level I use items, such as armor and ammo packs to lure players to a location and then trigger a trap, starting an enemy encounter. I wanted to create the feeling that the player is an intruder in this castle and by picking up these items, they alert the guards around.
I found this was a good way to challenge the player and keep them on their toes throughout the level.
Bait and Trap
Scripted sequences
I used the scripting options offered by Trenchbroom engine to set up sequenced encounters where different groups of enemies attack the player as the fight goes on.
To spawn the enemies in I used spawn closets hidden in the level as well as teleportation.
Foreshadowing
I used foreshadowing at several parts of the level to build up tension and curiosity for the player and make their moment of finally reaching the desired destination more impactful.
On the left is a snippet of how the fortress is slowly starting to be revealed to the player as they approach.
Feedback and Iteration
I found out early in development that the only way I can get closer to achieving the design intent of the level was to test it with new players. I realized how after a certain point a fresh eye is necessary to see the problems with the content that I cannot make out anymore. Gathering feedback, assessing it into actionable points, seeking advice and drawing inspiration from various sources was crucial for reaching the desired quality.
Above is an example of improving a room after receiving feedback: Here th problem was player navigation and not finding the way forward, since all areas looked similar. Following this feedback I added colors to my blockout language and created landmarks for each room to make them distinct and recognizable.
Project reflection
Taking on the task to develop a playable level from start to finish in 8 weeks proved to be a great challenge as well as an invaluable learning experience. In this short timeframe I went through the entire development pipeline, including testing and assessing feedback in the end. I feel proud of what I have created and happy to have learned a number of lessons, including:
The 4-step level design as a story structure
I ended up utilizing the structure of Introduction - Development - Twist - Conclusion when concepting for my level and through testing I began to see how well it produced a satisfying arc in the player experience.
Being selective with feedback assessment
Through extensive playtesting I received a lot of feedback points, some of which were contradicting each other. At first I did not know how to deal with this issue, but then after a while I realized that no experience is for everyone, so I need to determine my target audience and strive to make the best experience for them in particular.
Not being afraid to start over when needed
This project was a first pancake in a lot of ways for me. It often occured that what I initially planned did not go the way I wanted to. But realizing that quickly and starting over with the knowledge I acquired through the first attempt building something that worked better ended up being much easier than I thought. With this I learned that experimentation is a key element in developing levels and the purpose of a gameplay beat does not necesserily have to be its inclusion in the final level, it can just serve as a way to explore the design’s direction so that I can make something better next time.


